今度は、Pivotを用いたプロジェクトを作ってみます。
Pivotのプロジェクトは、前回使用したBlankプロジェクトと共通点も多く、割とシンプルな構成になっています。
チェックすべき箇所も少ないので、CodeBehind版/MVVM Basic版の両方をまとめて見ていきます。
プロジェクトの作成
それぞれ、以下のような設定でプロジェクトを作成します。
CodeBehind版
- ProjectType: Pivot and Tabs
- Framework: Code Behind
- Pages, Features: Blank Pageを一つ追加
MVVM Basic版
- ProjectType: Pivot and Tabs
- Framework: MVVM Basic
- Pages, Features: Blank Pageを一つ追加
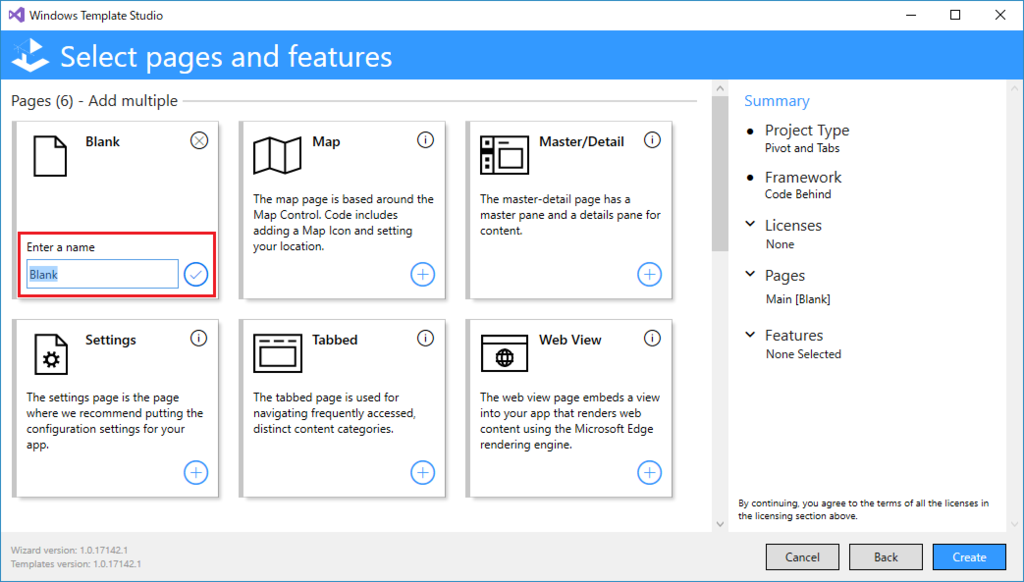
Pivotでページ切替を行うので、プロジェクト作成時に以下のボタンで、Blank Pageを一つ追加しておきましょう。
Pivotプロジェクトの構成
Pivotプロジェクトは、今まで使ってきたBlankとほぼ同じプロジェクト構成になっています。
ここでは、Blankとの違いだけを確認します。
以下のファイルが、Blankプロジェクトと比較して新たに追加された要素となります。
| CodeBehind | MVVM Basic |
|---|---|
 |  |
App.xaml.cs
ActivationServiceをPivotPageを指定で生成するようになっています。
ということで、アプリを起動するとPivotPage.xamlが表示されます。
private ActivationService CreateActivationService()
        {
            returnnew ActivationService(this, typeof(Views.PivotPage));
        }
PivotPage
PivotPageでは、Pivotコントロールを使って、MainPageとBlankPageの表示切り替えを行っています。
ただPivotコントロールがあるだけのシンプルなページですね。
<Pagex:Class="Pivot_MvvmBasic.Views.PivotPage"xmlns="http://schemas.microsoft.com/winfx/2006/xaml/presentation"xmlns:x="http://schemas.microsoft.com/winfx/2006/xaml"xmlns:d="http://schemas.microsoft.com/expression/blend/2008"xmlns:mc="http://schemas.openxmlformats.org/markup-compatibility/2006"xmlns:model="using:Pivot_MvvmBasic.Models"xmlns:views="using:Pivot_MvvmBasic.Views"mc:Ignorable="d"><Grid Background="{ThemeResource ApplicationPageBackgroundThemeBrush}"><Pivot x:Uid="PivotPage"><PivotItem x:Uid="PivotItem_Main"><Frame><views:MainPage/></Frame></PivotItem><PivotItem x:Uid="PivotItem_Blank"><Frame><views:BlankPage/></Frame></PivotItem></Pivot></Grid></Page>
PivotPage.xaml.cs
コードビハインドは、CodeBehind/MVVMBasicなどの、選択したプロジェクトタイプに合わせた内容のコードが生成されています。
特筆すべき点はないので、ここは省略します。
PivotViewModel.cs
MVVM Basicのプロジェクトタイプの場合は、以下のようなVMが作成されます。
特に何もしていない、
publicclass PivotViewModel : Observable
    {
        public PivotViewModel()
        {
        }
    }
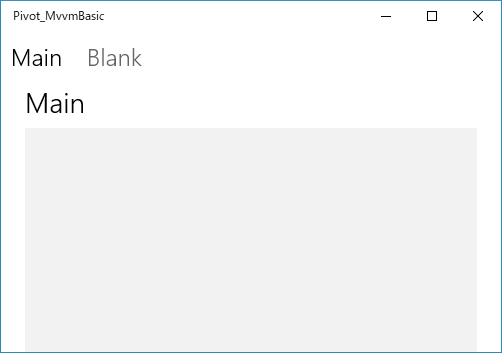
実行すると、こんな感じのウィンドウが表示されます。