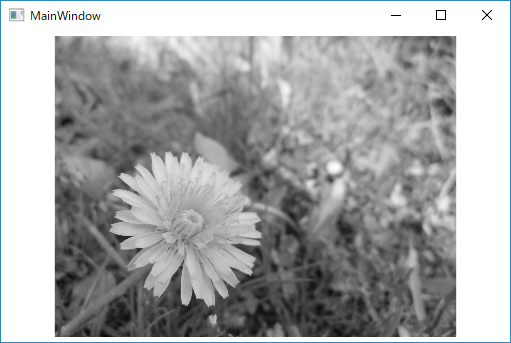
今回はImageSharpで編集した画像をWPFのUIで表示してみます。
ImageSharpでは、Imageというクラスで画像データを扱っています。(←WPFにも同名のImageコントロールというクラスがありますが別物です。)
そのままではWPFのUIに表示できないので、WPFで扱えるようBitmapSourceなどのオブジェクトに変換して表示してみます。
名前空間の注意
コードビハインドなど、WPFの各種名前空間が参照されているコードでは、WPFとImageSharpの間でImageクラスなどの名前がぶつかってしまいます。そんな時は、以下のように名前空間まで含めて書いてクラス名の衝突を回避します。
using (Image<Bgr24> image = SixLabors.ImageSharp.Image.Load<Bgr24>("Images/source.jpg"))
ImageSharpの画像から、WPF用の画像データへ変換
WPFでは、画像データをウィンドウ上のImageコントロールで表示するためには、ImageSource/BitmapSource派生の画像データに変換しなければなりません。
ということで、ImageSharpで画像を読み込みモノクロ化などの変換をした結果を、WPF用の画像に変換して表示してみます。
MainWindow.xaml
<Window x:Class="ImageSharpWpfTest.MainWindow"xmlns="http://schemas.microsoft.com/winfx/2006/xaml/presentation"xmlns:x="http://schemas.microsoft.com/winfx/2006/xaml"xmlns:d="http://schemas.microsoft.com/expression/blend/2008"xmlns:mc="http://schemas.openxmlformats.org/markup-compatibility/2006"xmlns:local="clr-namespace:ImageSharpWpfTest"mc:Ignorable="d"Title="MainWindow"Height="350"Width="525"><Grid><Image x:Name="image"Margin="5"/></Grid></Window>
MainWindow.xaml.cs
/// <summary>/// MainWindow.xaml の相互作用ロジック/// </summary>publicpartialclass MainWindow : Window
    {
        public MainWindow()
        {
            InitializeComponent();

            // ImageSharpで画像の読み込みusing (Image<Bgr24> image = SixLabors.ImageSharp.Image.Load<Bgr24>("Images/source.jpg"))
            {
                // 読み込んだ画像を編集(Mutateメソッドを呼び出すと、画像を編集できるようになる)
                image.Mutate(x =>
                {
                    // グレースケールに変換
                    x.Grayscale();
                });

                // ImageShaprの画像オブジェクトから、ピクセルデータのbyte配列を取得する。
                var pixels = image.SavePixelData();
                // byte列からBitmapSourceオブジェクトを作成
                var bmp = BitmapSource.Create(image.Width, image.Height, 96, 96, PixelFormats.Bgr24, null, pixels, image.Width * 3);

                //// WriteableBitmapに変換する場合はこうする//var wb = new WriteableBitmap(image.Width, image.Height, 96, 96, PixelFormats.Bgr24, null);//wb.WritePixels(new Int32Rect(0, 0, image.Width, image.Height), pixels, image.Width * 3, 0);// Imageコントロールに、画像を設定this.image.Source = bmp;
            }
        }
    }

とりあえず、こんな感じのコードでImageSharpで作った画像をWPFで表示できます。