お手軽にWPFアプリにモダンなデザインを適用できる、MahApps.Metroというライブラリを使ってみました。
MahApps.Metro Documentation
この手のモダンなデザインを適用するライブラリでは、 Modern UI for WPF(MUI)というのもあります。
まだちょろっと使ってみただけですが、MUIと比較してみるとMahApps.Metroの方がクセが少なくてシンプルで使いやすそうな印象です。
使い方
元のウィンドウ
まずは、こんな感じのウィンドウを作ります。
TextBlockとTextBox、Buttonを配置しただけのシンプルなページです。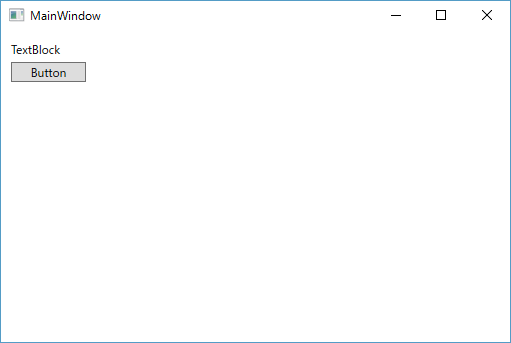
<Window x:Class="MahAppsMetroTest.MainWindow"xmlns="http://schemas.microsoft.com/winfx/2006/xaml/presentation"xmlns:x="http://schemas.microsoft.com/winfx/2006/xaml"xmlns:d="http://schemas.microsoft.com/expression/blend/2008"xmlns:local="clr-namespace:MahAppsMetroTest"xmlns:mc="http://schemas.openxmlformats.org/markup-compatibility/2006"Title="MainWindow"Width="525"Height="350"mc:Ignorable="d"><Grid><TextBlock Margin="10,10,0,0"HorizontalAlignment="Left"VerticalAlignment="Top"Text="TextBlock"TextWrapping="Wrap" /><Button Width="75"Margin="10,31,0,0"HorizontalAlignment="Left"VerticalAlignment="Top"Content="Button" /></Grid></Window>
インストール
NugetからMahApps.Metroで検索してインストールします。
準備
WindowをMetroWindow派生クラスになるように修正します。
xamlとコードビハインドをそれぞれ以下のように修正します。
MainWindow.xaml
<Controls:MetroWindow x:Class="MahAppsMetroTest.MainWindow"xmlns="http://schemas.microsoft.com/winfx/2006/xaml/presentation"xmlns:x="http://schemas.microsoft.com/winfx/2006/xaml"xmlns:Controls="clr-namespace:MahApps.Metro.Controls;assembly=MahApps.Metro"xmlns:d="http://schemas.microsoft.com/expression/blend/2008"xmlns:local="clr-namespace:MahAppsMetroTest"xmlns:mc="http://schemas.openxmlformats.org/markup-compatibility/2006"Title="MainWindow"Width="525"Height="350"mc:Ignorable="d"><Grid><TextBlock Margin="10,10,0,0"HorizontalAlignment="Left"VerticalAlignment="Top"Text="TextBlock"TextWrapping="Wrap" /><Button Width="75"Margin="10,31,0,0"HorizontalAlignment="Left"VerticalAlignment="Top"Content="Button" /></Grid></Controls:MetroWindow>
MainWindow.xaml.cs
using MahApps.Metro.Controls;

namespace MahAppsMetroTest
{
    /// <summary>/// MainWindow.xaml の相互作用ロジック/// </summary>publicpartialclass MainWindow : MetroWindow
    {
        public MainWindow()
        {
            InitializeComponent();
        }
    }
}
コードビハインド側は、クラスの継承の部分を省略してもokとの事。
windowはパーシャルクラスとして定義されてるんで、xaml側でちゃんとクラスの宣言されてますもんね。
スタイルの設定
続いて、app.xamlにデザインのテーマを決めるためのリソースを追加します。
App.xaml
<Application x:Class="MahAppsMetroTest.App"xmlns="http://schemas.microsoft.com/winfx/2006/xaml/presentation"xmlns:x="http://schemas.microsoft.com/winfx/2006/xaml"xmlns:local="clr-namespace:MahAppsMetroTest"StartupUri="MainWindow.xaml"><Application.Resources><ResourceDictionary><ResourceDictionary.MergedDictionaries><!-- MahApps.Metro resource dictionaries. Make sure that all file names are Case Sensitive! --><ResourceDictionary Source="pack://application:,,,/MahApps.Metro;component/Styles/Controls.xaml" /><ResourceDictionary Source="pack://application:,,,/MahApps.Metro;component/Styles/Fonts.xaml" /><ResourceDictionary Source="pack://application:,,,/MahApps.Metro;component/Styles/Colors.xaml" /><!-- Accent and AppTheme setting --><ResourceDictionary Source="pack://application:,,,/MahApps.Metro;component/Styles/Accents/Blue.xaml" /><ResourceDictionary Source="pack://application:,,,/MahApps.Metro;component/Styles/Accents/BaseLight.xaml" /></ResourceDictionary.MergedDictionaries></ResourceDictionary></Application.Resources></Application>
スタイルは他にもいろいろあります。スタイルについてはまた後程。
で、たったこれだけで、こんな感じにイカしたデザインのウィンドウが出来上がります。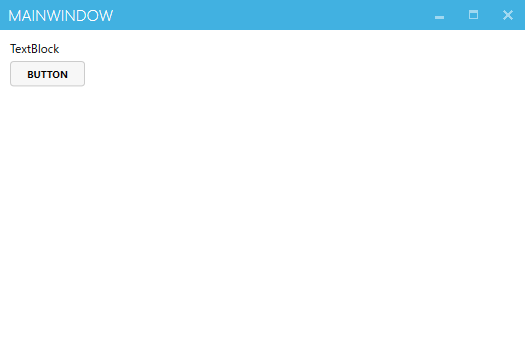
スタイルの変更
アプリ全体のスタイルは、App.xamlに設定するResourceDictionaryを切り替えることで選択できます。
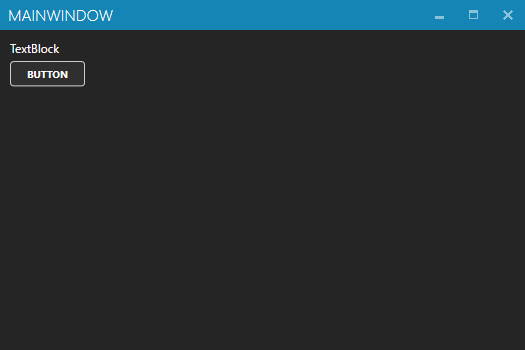
Red, Green, Blue, ・・・などのアクセントカラーの選択と、BaseLight/BaseDarkのどちらかから白基調/黒基調のどちらにするかを選ぶことができます。
App.xaml
<!-- Accent and AppTheme setting --><ResourceDictionary Source="pack://application:,,,/MahApps.Metro;component/Styles/Accents/Blue.xaml" /><ResourceDictionary Source="pack://application:,,,/MahApps.Metro;component/Styles/Accents/BaseDark.xaml" />
用意されているスタイル類は以下に書かれてます。
http://mahapps.com/guides/styles.html#app
BaseLight/BaseDarkの比較
| BaseLight | BaseDark |
|---|---|
 |  |
ResourceをApp.xamlにではなく、各MetroWindowに書けば、Windowごとに別々のスタイルを設定することもできます。
コードビハインドからのスタイル切替
ThemeManagerクラスを使うと、コードから動的にアプリのデザインを変更することができます。
例えばボタンクリックのイベントハンドラに、↓みたいなコードを書けば、ボタン押下時にGreen/BaseDarkなデザインに切り替わります。
privatevoid Button_Click(object sender, RoutedEventArgs e)
        {
            var theme = ThemeManager.DetectAppStyle(Application.Current);

            ThemeManager.ChangeAppStyle(Application.Current,
                                        ThemeManager.GetAccent("Green"),
                                        ThemeManager.GetAppTheme("BaseDark"));
        }
ウィンドウのカスタマイズ
MetroWindowクラスは、以下のようなプロパティでカスタマイズできます。
各種基本のプロパティ
| プロパティ名 | 内容 |
|---|---|
| ShowTitleBar | タイトルバーの表示有無 |
| ShowIconOnTitleBar | タイトルバーにアイコンを表示するか否か |
| ShowMinButton | |
| ShowMaxRestoreButton | |
| ResizeMode | こいつをNoResizeにしたりCanMinimizeにしたりすると、最大化/最小化ボタンの表示有無も併せて切り替わります。 |
| SaveWindowPosition | ウィンドウの表示位置を保存するか否か。こいつをTrueにしておくと、次回ウィンドウ表示時には、依然閉じた際の座標で表示されるようになります。 |
WindowCommands
MetroWindowクラスには、LeftWindowCommands/RightWindowCommandsというプロパティがあり、タイトルバーの左右にコマンド実行のためのボタン類が作れるようになっています。
こんな感じ。
<Controls:MetroWindow x:Class="MahAppsMetroTest.MainWindow"xmlns="http://schemas.microsoft.com/winfx/2006/xaml/presentation"xmlns:x="http://schemas.microsoft.com/winfx/2006/xaml"xmlns:Controls="clr-namespace:MahApps.Metro.Controls;assembly=MahApps.Metro"xmlns:d="http://schemas.microsoft.com/expression/blend/2008"xmlns:local="clr-namespace:MahAppsMetroTest"xmlns:mc="http://schemas.openxmlformats.org/markup-compatibility/2006"Title="MainWindow"Width="500"Height="300"BorderThickness="0"GlowBrush="Black"mc:Ignorable="d"><Controls:MetroWindow.RightWindowCommands><Controls:WindowCommands><Button Content="settings" /><Button Content="acount" /></Controls:WindowCommands></Controls:MetroWindow.RightWindowCommands>以下略

Windowのデザイン
ボーダー付きウィンドウ
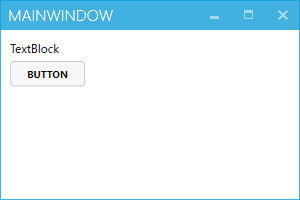
MetroWindowに、以下のプロパティをつけることでこんな枠付きのデザインになります。
BorderBrush="{DynamicResource AccentColorBrush}"
BorderThickness="1"
VisualStudio風のWindow枠
GrowBrushプロパティの指定を行うと、こんな感じのVS風の光ったウィンドウ枠になります。
GlowBrush="{DynamicResource AccentColorBrush}"
BorderThickness="1"
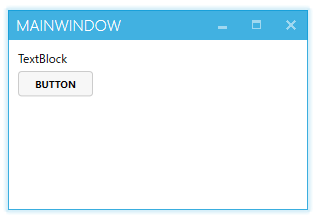
GlowBrushをBlackにして、枠線の太さを0にしておけば、ウィンドウにドロップシャドウを付けたようなデザインになります。
GlowBrush="Black"
BorderThickness="0"
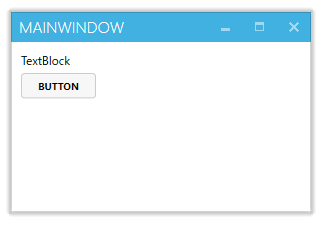
各種コントロール
Button系
Button/ToggleButtonに使える、以下のようなスタイルが用意されてます。
<WrapPanel Orientation="Horizontal"><Button Width="75"Margin="10"Content="Button" /><Button Width="75"Margin="10"Content="Button"Style="{DynamicResource MetroCircleButtonStyle}" /><Button Width="75"Margin="10"Content="Button"Style="{DynamicResource SquareButtonStyle}" /><Button Width="75"Margin="10"Content="Button"Style="{DynamicResource AccentedSquareButtonStyle}" /></WrapPanel>

アイコン類のパッケージ
MetroCircleButtonは、アイコンリソースとともに使うといい感じになります。
アイコンなどはMarApps.Metro本体には含めず、MahApps.Metro.Resourcesという別パッケージで配布されています。
以下のコマンドで、色々なアイコン類を含んだリソースファイルがプロジェクトに追加されます。
Install-Package MahApps.Metro.Resources
アイコンの使い方
App.xamlのリソース定義に↓を加えておきます。
<ResourceDictionary Source="/Resources/Icons.xaml" />
すると、こんな風にリソースとして色んなアイコンが使えるようになります。
<Button Width="55"Height="55"Margin="10"Style="{DynamicResource MetroCircleButtonStyle}"><StackPanel Orientation="Vertical"><Rectangle Width="20"Height="20"><Rectangle.Fill><VisualBrush Stretch="Fill"Visual="{StaticResource appbar_add}" /></Rectangle.Fill></Rectangle><TextBlock Text="Add" /></StackPanel></Button>

TextBox
TextBoxの動作をカスタマイズするための以下のような添付プロパティが用意されています。
| 添付プロパティ名 | 内容 |
|---|---|
| TextBoxHelper.Watermark | テキストが空のときに説明文のような透かし文字を表示できます。 |
| TextBoxHelper.ClearTextButton | 入力した文字をクリアするためのボタンが追加されます |
<TextBox Width="120"Height="23"Margin="10"Controls:TextBoxHelper.Watermark="This is a textbox"TextWrapping="Wrap" /><TextBox Width="120"Height="23"Margin="10"Controls:TextBoxHelper.ClearTextButton="True"TextWrapping="Wrap" />

MahApps.Metroのカスタムコントロール類
MahApps.Metroでは、他にも色々と便利なコントロールが用意されています。
MetroProgressBar
<Controls:MetroProgressBar Width="120"Margin="5"Value="60" /><Controls:MetroProgressBar Width="120"Margin="5"IsIndeterminate="True"Value="60" />

ProgressRing
こんな感じのよく見かけるタイプのプログレス表示。
キャプチャ画像にしてしまうと、なんだかよくわかりませんが、、、くるくる回ってる進捗表示。
<Controls:ProgressRing IsActive="True" />

RangeSlider
下限値と上限値で範囲指定ができるスライダー。
<Controls:RangeSlider Width="130"Margin="10"Minimum="0"Maximum="100"LowerValue="10"UpperValue="70"MinRange="5"/>
↓こんな風に表示されます。
SplitButton/DropDownButton
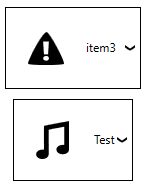
SplitButtonはボタン右端の部分をクリックすると、コンボボックスみたいなドロップダウンリストが出てきて、要素を選択することができます。選択した要素がボタンのコンテンツとして表示されます。
SplitButton/DropDownButtonともに、ComboBoxなどと同じようにItemsSourceやDisplayMemberPathなどのプロパティを使ってリストに表示する要素を設定できます。
<Controls:SplitButton Margin="10"HorizontalAlignment="Center"VerticalAlignment="Center"HorizontalContentAlignment="Left"VerticalContentAlignment="Center"Icon="{DynamicResource appbar_alert}"ItemsSource="{Binding SampleList}"SelectedIndex="2" /><Controls:DropDownButton Width="120"VerticalContentAlignment="Center"Content="Test"Icon="{DynamicResource appbar_music}"ItemsSource="{Binding SampleList}"/>
Tile
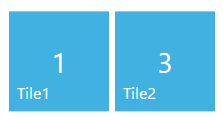
win8以降のストアアプリ風なタイルのコントロール。
<Controls:Tile Title="Tile1"Width="100"Height="100"Count="1"TiltFactor="2" /><Controls:Tile Title="Tile2"Width="100"Height="100"Count="3"TiltFactor="2" />
ToggleSwitch
こんな風にトグルスイッチ表示ができるコントロールです。
主なプロパティはこんな感じ。
| プロパティ名 | 内容 |
|---|---|
| Header | 項目のヘッダーを設定 |
| OnLabel | ON状態の表示文字列 |
| OffLabel | OFF状態の表示文字列 |
| IsChecked | トグル状態がONになっているか |
<Controls:ToggleSwitch Header="項目名" /><Controls:ToggleSwitch Header="ヘッダー"OnLabel="オン"OffLabel="オフ"IsChecked="True"/>
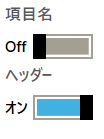
NumericUpDown
数値入力用のテキストボックスで、コントロール右端に数値を増減させるためのボタンが付いたコントロールです。
| プロパティ名 | 内容 |
|---|---|
| Minimum | 下限値を設定 |
| Maximum | 上限値を設定 |
| Interval | 一回のアップダウンでの変化量を設定 |
| Speedup | +-ボタンを押し続けたときに、数値の変化する速度を上げるかどうかを設定 |
| 小数点を持つかどうかを設定 | |
| InterceptArrowKeys | 上下のカーソルキーで、数値の増減をできるようにするかを設定。Falseにするとカーソルキー動作が無効になります |
| InterceptMouseWheel | マウスのホイールで数値の増減をできるようにするかを設定。 |
| InterceptManualEnter | キーボードから数値以外のテキスト入力を抑制するかどうかを設定。 |
| HideUpDownButtons | +-のボタンを非表示にします |
| StringFormat | 数値表示のフォーマット指定 |
<Controls:NumericUpDown Minimum="0"Maximum="100"Interval="5" />

FlipView
UWPなどにある同名のコントロールと同じようなものです。
表示する要素は、以下の例のようにXAMLで直接定義もできますし、ItemsSourceプロパティで設定することもできます。
<Controls:FlipView BannerText="バナーテキスト"IsBannerEnabled="True"><Image Source="Images/1.jpg"Stretch="UniformToFill" /><Image Source="Images/2.jpg"Stretch="UniformToFill" /><Image Source="Images/3.jpg"Stretch="UniformToFill" /></Controls:FlipView>
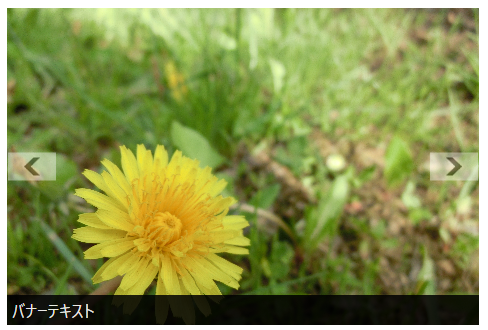
こんなプロパティが用意されてます。
| プロパティ名 | 内容 |
|---|---|
| BannerText | コントロール下部に表示するテキストを設定 |
| IsBannerEnabled | BannerTextを表示するか否かを設定 |
Dialogs系コントロール
今度はダイアログ表示用のコントロール。
全画面でメッセージを表示するMessageDialogと、プログレス表示もできるタイプのProgressDialogというクラスがあります。
それぞれ、ShowMessageAsync/ShowProgressAsyncというメソッドで開くことができます。
<WrapPanel Grid.Row="1"><Button Margin="10"Click="ShowMessageDialog"Content="Show MessageDialog" /><Button Margin="10"Click="ShowProgressDialog"Content="Show ProgressDialog" /></WrapPanel>
// 以下のusing文を追加using MahApps.Metro.Controls.Dialogs;
// 中略private async void ShowMessageDialog(object sender, RoutedEventArgs e)
        {
            await this.ShowMessageAsync("タイトル", "本文");
        }

        private async void ShowProgressDialog(object sender, RoutedEventArgs e)
        {
            var pdc = await this.ShowProgressAsync("タイトル", "プログレス表示", true);

            for(var i=0; i<10; i++)
            {
                pdc.SetProgress(1.0 / 10 * i);
                await Task.Delay(100);
            }
            await pdc.CloseAsync();
        }
↓MessageDialogはこんな感じの表示です。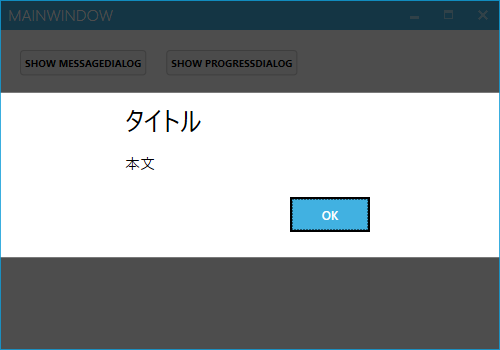
続いてProgressDialog。MessageDialogの下部にプログレス表示がくっついた感じです。 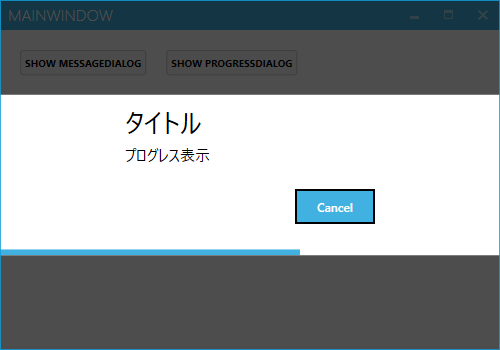
ここでは省略しますが、CustomDialogというクラスを使うと、任意の要素をこの形のダイアログで表示することができるようです。
Flyouts
win8系のストアアプリで使われてたFlyoutコントロールを再現したもの。
正直、デスクトップアプリだと、この辺のコントロールはあんま使わないかな、って気がします。。
使い方はこんな感じ。
<Controls:MetroWindow x:Class="MahAppsMetroTest.MainWindow"xmlns="http://schemas.microsoft.com/winfx/2006/xaml/presentation"xmlns:x="http://schemas.microsoft.com/winfx/2006/xaml"xmlns:Controls="clr-namespace:MahApps.Metro.Controls;assembly=MahApps.Metro"xmlns:d="http://schemas.microsoft.com/expression/blend/2008"xmlns:local="clr-namespace:MahAppsMetroTest"xmlns:mc="http://schemas.openxmlformats.org/markup-compatibility/2006"xmlns:sys="clr-namespace:System;assembly=mscorlib"Title="MainWindow"Width="500"Height="350"GlowBrush="{DynamicResource AccentColorBrush}"mc:Ignorable="d"><Controls:MetroWindow.Flyouts><Controls:FlyoutsControl><Controls:Flyout x:Name="flyout"Width="200"Header="Flyout"Position="Right"><Button Width="75"Margin="10"HorizontalAlignment="Left"VerticalAlignment="Top"Content="Button" /></Controls:Flyout></Controls:FlyoutsControl></Controls:MetroWindow.Flyouts><Grid Margin="10"><Button Width="75"Margin="10,10,0,0"HorizontalAlignment="Left"VerticalAlignment="Top"Click="ShowFlyout"Content="Show Flyout" /></Grid></Controls:MetroWindow>
コードビハインドから以下のようにIsOpenプロパティをtrueにすることでFlyoutを表示できます。
privatevoid ShowFlyout(object sender, RoutedEventArgs e)
        {
            this.flyout.IsOpen = true;
        }
もちろん、XAML上でIsOpenプロパティをバインドして開いてもOK!!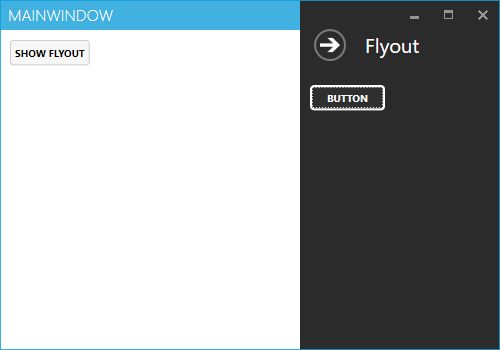
主なプロパティはこんな感じ。
| プロパティ名 | 内容 |
|---|---|
| Position | フライアウトを表示する位置を指定(Left/Right/Top/Bottomから選択) |
| Theme | (Adapt/Inverse/Dark/Light/Accentから選択) |